By DENTUREWAY customer Shawn

Quick Summary
Can a beginner successfully make a DIY denture?
Yes—but expect a learning curve.
After three attempts, I successfully completed a lower partial denture. The biggest lessons were:
- Mix impression putty quickly
- Layer gypsum carefully
- Let casts fully cure before removal
- Use truly boiling water for thermoplastic gums
- Plan tooth placement before embedding
- Make small adjustments for comfort
The process took patience, but it saved me hundreds of dollars compared to traditional denture options.
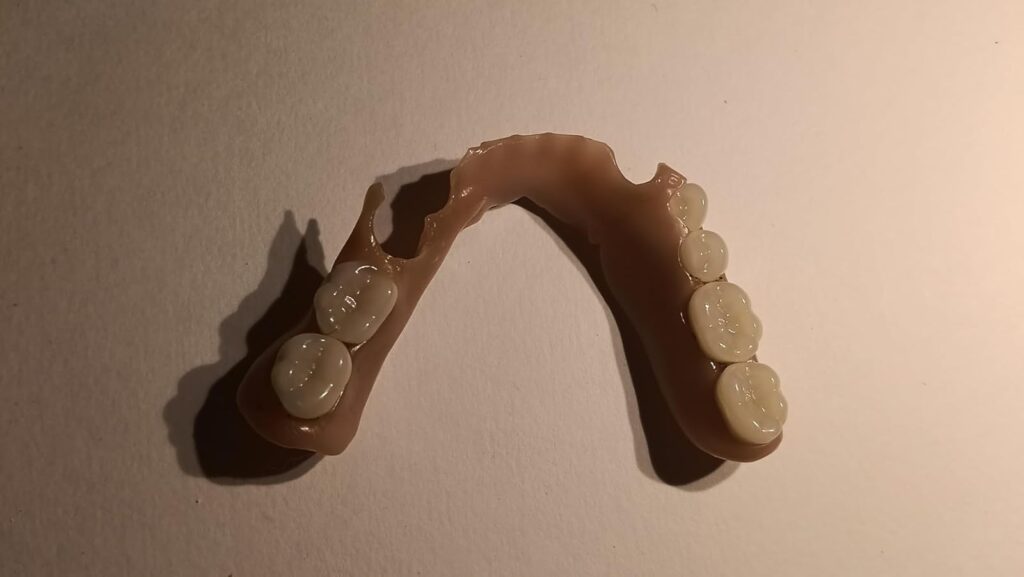
I eventually got it right on my third try and ended up with a successful lower partial denture. Looking back, most of my mistakes came from rushing certain steps or not fully understanding how the materials behave.
I’ll be honest: there is a learning curve with this.
If you’re about to start your own DIY denture project, here are the things I wish I had known from the beginning.
The Impression Was Actually the Easiest Part
The putty was easy to work with.
You simply combine the blue and white materials and place them into the tray. The kit includes trays ranging from small to large, so finding the correct size wasn’t difficult.
My biggest advice here is simple:
Mix the putty quickly and get it into the tray right away.
Once I did that, getting a usable impression was surprisingly straightforward.
Note: For new users, it is recommended to read How to Take a Dental Impression at Home first.
Making the Stone Cast: Work Carefully, But Don’t Work Too Slowly
The yellow stone powder (gypsum) was fairly easy to mix, but this was the first step where technique mattered.
One thing I discovered:
It works better to add water to the bowl first, then add the stone powder.
The mixture shouldn’t be runny, but it shouldn’t be thick like paste either. Think of it more like batter.
The best method I found was to use the included spatula and add the material into the mold in layers.
Trying to pour too much at once caused overflow and trapped air. Key insights regarding the steps for plaster models: How to Prevent the Plaster Model from Cracking or Breaking?
I started by filling the deepest parts first, then gradually built up layer after layer until I reached the top of the tray. I even added a little extra to create a flat base for the cast model.
You do need to move with purpose during this stage because the material starts thickening fairly quickly.
You’ll actually see it happen and can judge how much working time you have left.
The Hardest Part: Removing the Cast
This was where my first attempt failed.
I tried removing the cast before it had fully cured and the thinner edges crumbled apart.
A few lessons learned:
- Let the cast sit for at least two hours.
- If it still feels damp, wait longer.
- Use the supplied Vaseline on the blue mold before pouring the stone.
- Remove the cast slowly and gently.
What helped me most was using a flat metal nail file to carefully work around the edges before lifting the thicker center portion.
Don’t try to pry the entire thing out at once.
Patience matters here.
Once removed, I let the cast sit for another hour to continue drying before moving to the next step.
The Gum Material Needs Truly Hot Water
This was another lesson I learned through trial and error.
The pink gum material needs boiling water to soften properly.
You’re looking for a translucent appearance.
If it’s still opaque, it probably isn’t ready yet.
Give it a few minutes.
Also be careful when removing it from the water—it is hot and surprisingly sticky at first.
The Good News: Mistakes Are Usually Fixable
One thing I liked about working with the thermoplastic gum material is that mistakes aren’t necessarily permanent.
If the shape wasn’t right, I could simply dip the cast back into hot water for a few seconds and soften everything again.
I did this multiple times while shaping.
That ability to reheat and adjust reduced a lot of the stress during the process.
Placing the Teeth Takes Planning
If you’re making a partial denture, you’ll need to cut and position individual teeth.
The important thing to know is:
Once the teeth are properly embedded, removing them isn’t easy.
Have your layout planned beforehand.
I found it helpful to soften the gum material slightly and then use a dental pick or small tool to gently work material around the base of each tooth.
This helps hold the teeth securely while also creating a more natural appearance.
The DIY Denture videos were extremely helpful during this stage.
Watching someone do it once makes the process much easier to understand.
Comfort Comes From the Final Adjustments

Once the teeth were in place, I dipped the denture back into hot water briefly and smoothed rough edges.
This step made a noticeable difference in comfort.
One area to pay attention to is the portion nearest the roof of the mouth or tongue.
If this area is too thick, you’ll end up with gaps where food can collect.
Take your time here.
Small adjustments make a big difference.
My Biggest Takeaway
This is absolutely a DIY project.
You should watch the videos, read the instructions, and have your tools ready before you begin.
There is a learning curve.
I needed three attempts before I got the result I wanted.
But once I understood how the materials behaved and where I had gone wrong, everything became much easier.
In the end, I successfully completed my lower partial denture and saved hundreds of dollars compared to what I was quoted elsewhere.
It required a few hours, some patience, and a willingness to learn.
For me, it was worth it.
Read more about the pritical experiences shared by the Dentureway community.